[trustindex no-registration=google]

How to label boxes for moving?

Moving to a new house can be stressful, especially if it’s your first time. The process involves a lot of organisation, and feeling a bit overwhelmed is normal. The pressure mainly comes from getting everything ready for the move and dealing with the emotions of such a significant change in our lives.

For those moving for the first time, planning ahead is important, like looking for a moving service in advance and packing belongings properly. To avoid last-minute panic, it’s a good idea to research and get quotes from a few removal companies. Start packing early and make sure to label the boxes correctly. It will help you easily find your things when unpacking in your new home. Taking these steps can make the moving process smoother and less stressful.

How to label boxes for moving

Labelling is crucial during a move

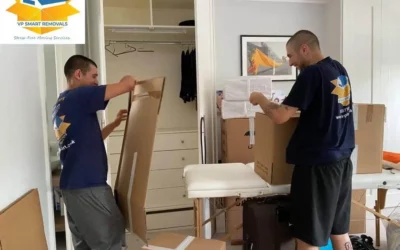
Picture this: your new home is in chaos, and you’re on the verge of tears, searching for your stuff in a sea of unmarked boxes. Can you handle that? Probably not. That’s why labelling your boxes while packing is a must.

Choose an easy-to-understand code system to describe the box’s contents and destination. This simple step will save you from a lot of trouble when you need to find something later. It also helps the movers know the order for loading boxes onto the truck.

Clearly labelled boxes make unloading and arranging items in your new home much smoother. Plus, marking fragile items ensures they’re handled with care. Numbering each box helps you quickly spot if one goes missing.

Now, what’s the best way to label your moving boxes? Is there a universal system that works for all situations?

Get ready for packing and labelling with these essentials

  • Cardboard Boxes or any storage containers
  • Coloured paper
  • Paper Tape
  • Pens and a few sheets of paper
  • Clear Packing Tape and Coloured Tape
  • Quality permanent markers in various colours

You can either download printable moving box labels or create your own. These materials will make your packing and labelling process a breeze.

Check also:
How to Lift Heavy Objects Without Harming Yourself?
Moving House Checklist: A Comprehensive Guide

Before you begin packing, create a master inventory list

Take the time to list all your belongings and consider adding prices for more valuable items. It’s also a good idea to take pictures of these items. This detailed inventory will help you keep track of your possessions during packing. Having this information beforehand will be beneficial if anything gets damaged during the move. You might wonder how this connects to the labelling process, but bear with us!

How to label moving boxes properly

Labelling moving boxes doesn’t have a one-size-fits-all approach. You can use various effective labelling methods without causing confusion. Proper labelling aids professional movers on the moving day and simplifies the unpacking process for you. Prepare your packing and labelling supplies, and let’s get started!

Simplify your unpacking by using different colours to label your moving boxes. This method works well with room-by-room labelling, assigning a unique colour to each room. For example, mark “Kitchen” with a yellow permanent marker and “Living room” in blue, ensuring removalists place each box in its designated area. Use quality waterproof markers to prevent smudging on moving days in case of rain or snow.

Seal boxes with matching or clear tape over the corresponding colour paper to reinforce your colour-coded system. Carry the colour code into your new home by attaching the same colour tape or paper to the doors of each room. It ensures clear communication with movers, saving you time rearranging boxes later.

Check also:
How to simplify my home move?
What are the standard house removal mistakes, and how to avoid them?

Room Labels

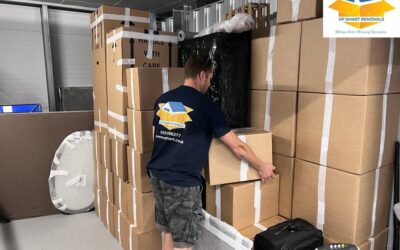
Let’s talk about the room-by-room packing system. It’s a proven method that makes unloading and unpacking a breeze, even with just one label colour. Tape the same label on each side and place one on the box for easy identification.

This approach dramatically helps movers find the right room promptly. It avoids the inconvenience of searching for a label or moving a box because the label is on the other side.

Priority Code Labels

This labelling system combines a couple of house removal concepts. It helps determine the order of loading boxes onto the moving truck. Removalists can prioritise unloading items, ensuring they go to their designated rooms.

The idea is also to remind yourself which box is a priority before unpacking, making the process more organised and efficient.

Number Code Labels

Remember our advice about creating an inventory list? Well, the number code labelling system builds on that. Assign a number to each box in your inventory list and note which numbers belong to each room. For instance, when unpacking boxes 1 to 5, you can quickly reference your list to identify items destined for the kitchen.

If your priority is making tea, you can swiftly grab box number 3 for the kettle. It’s helpful to label box 3 with a clear “Kitchen” in red for the removalists to direct it easily.

Labels by Items

Packing items by category is a partial method and can’t replace other labelling systems. For example, group soft items like bedding, throws, rugs, and cushions together, or pack your kids’ winter clothes in a large bin bag. Use paper tape to label bin bags and plastic containers.

Another example is packing and labelling camping equipment with an added “L” for low priority. Small electrical appliances that require careful handling can also go in a designated box.

Decide how to group items, like packing the hairdryer and table fan with the coffee maker and juicer. Find what works for you by considering the pros and cons of this labelling system, with clarity in itemising the contents of each box being the key.

How to Unpack After Moving House

Now that you’ve arrived, it’s time to tackle the unpacking. Stay calm and take your time – it can be fun, especially if you did an excellent job packing and labelling. The hard work you put in before moving was meant to simplify unpacking. Use the labelling system again and start unpacking room by room, prioritising from high to low. Take regular breaks, savour the process, and gradually transform your new home stress-free, like painting a blank canvas.

How to Lift Heavy Objects Without Harming Yourself?

Other than symbolics, no one likes to lift heavy objects. Unfortunately, you can’t avoid doing it occasionally, whether it’s for moving items around or simply redecorating your house.

What most people ignore during the lifting process, though, is maintaining proper posture. Even if you’re physically fit, you should learn the correct technique for lifting heavy objects to avoid potential injuries.

That’s why we’re here. From examining the item’s weight to setting it down, we guide you through every step of the lifting process.

storage vp removals

Proper Technique to Lift Heavy Things

Unlike what most people think, lifting the item isn’t the first step. You need to consider several factors before you even touch the object.

  1. Identify the Weight of the Object.
    Here’s the thing: Even the tiniest objects can be too heavy. Dumbbells are small, but we all know how much gym enthusiasts struggle to lift them. So before lifting an object, try to identify if its weight is manageable. You don’t want to hurt your back, do you? You can do that by leaning down and sliding the item in different directions. That should help determine how heavy it is. If you can slide it without struggling, that means it’s manageable. If not, I recommend asking someone for help.
  2. Choose an Efficient Path.
    If you must walk a long distance carrying a heavy item, ensure your route takes the least effort out of you. That means avoiding turnarounds and moving any obstacles, toys, or furniture out of the way.
  3. Use Proper Posture.
    Now, it’s time to do the heavy lifting. No matter how strong you are, you must always get in a proper position before carrying a heavy object to avoid back pain. That’s the most crucial step in the process. So first, stand one foot from the object and keep your legs shoulder-width apart. Then, bend your knees and lower your body. Remember, don’t bend over the item. Always keep your back straight. When you grab the object, try to hold it from the bottom to maintain a better grip. Most people have a dominant arm but avoid putting too much weight on one arm over the other. Make sure the weight is evenly distributed. Once you have a solid grip, keep the item close to your chest and use your legs to support your weight while standing up.
  4. Start walking.
    Even when you’ve successfully lifted the object and are about to transport it, you still need to use a proper walking motion. We recommend bending your knees and taking small steps to maintain your balance. Avoid twisting your body because you might pull a muscle. If you get tired halfway through the home moving, put the object down and take a break. However, try to put it down at waist level so it’s easier to carry afterwards.
  5. Put the Item Down.
    When you reach your destination, your first instinct might be to drop the box immediately to eliminate that heavy weight. Don’t do that. As with lifting, you need to set the item down with a proper posture. Start by bending your knees until you ensure the bottom side of the item is fully touching the ground. Again, don’t bend over the box. Keep your back and neck straight to avoid potential injuries. Et voila!

Moving Heavy Objects With a Shoulder Dolly

As strong as you might be, you can’t lift everything by yourself. Sometimes, you need to use a lifting tool. In that case, we recommend using a shoulder dolly, which reduces the risk of injury and facilitates the lifting process.

That said, figuring out how to use it can be hard. So we’ll give you a quick guide.

  1. Set Up the Dolly
    Wear the harness like you’re wearing a vest or a t-shirt. If it comes with a chest strap, snap both sides together. If the tensioning buckle comes as a separate piece, attach it to the snaps of your harness. Now grab your side of the lifting strap and pass it over the back of the tension buckle’s bar, then fold it over the front side. Your partner should follow the same steps so that the lifting strap connects both of you.
  2. Place the Lifting Strap
    Once you and your friend are ready, put your foot on the back side of the object and tilt it back. Then, slide the belt beneath it, ensuring it sits flat to avoid any hindrance during lifting. Adjust the strap’s height to align with yours so you can lift the item easily.
  3. Use Proper Lifting Technique
    With shoulder dollies, your physical strength doesn’t matter that much. Your lifting technique is the decisive factor. Like the regular lifting process, start by bending your knees while keeping your back straight. If you and your partner differ in height, one would have to squat down more than the other. Then, put your arms on the object and stand up. Keep your arms extended to ensure your legs and shoulders do all the heavy lifting rather than your back. If it’s leaning in a specific direction, put it down and adjust the lifting strap accordingly.
  4. Moving With the Shoulder Dolly
    Once you’ve successfully stood up, moving with the shoulder dolly should be straightforward. Remember to extend your arms so your knees don’t hit the item.
    Don’t twist or bend your body to keep the item balanced on the lifting strap.
  5. Place the Item on the Ground
    Once you reach the desired destination, communicate with your partner to set the object down. Keep your back straight and bend your knees until the item safely touches the ground. Now, release the lifting strap, and you’re done.

Conclusion

Learning to lift heavy objects without hurting yourself is crucial to maintaining a healthy lifestyle. Whether using your strength or a shoulder dolly, the most decisive factor in moving a heavy object is proper technique and posture.

Related Articles

The Average Cost of Removals in the UK

The Average Cost of Removals in the UK

The Average Cost of Removals in the UK Moving can be a stressful and expensive process, especially when it comes to hiring a removals company. The cost of removals in the UK can vary depending on several factors, including the size of your property, the distance of...

How to Make Your Home Move Stress-Free ?

How to Make Your Home Move Stress-Free ?

Are you planning to move to a new home in London? Moving can be stressful and time-consuming, but with the help of professional house moving and packing services, the transition can be much smoother. Regarding house moving and packing services in London, there are...

How to label boxes for moving?

How to label boxes for moving?

Moving to a new house can be stressful, especially if it's your first time. The process involves a lot of organisation, and feeling a bit overwhelmed is normal. The pressure mainly comes from getting everything ready for the move and dealing with the emotions of such...

Moving House Checklist: A Comprehensive Guide

House Removals Services in London

Moving to a new house is an exciting milestone, but it can also be a daunting task. With so many things to organise and remember, it’s easy to feel overwhelmed. That’s why we’ve created the ultimate moving house checklist to help you stay organised and ensure a smooth transition into your new home. From notifying important entities to packing essentials, this comprehensive guide covers everything you need to do before, during, and after your move. If you need help moving your furniture, you can use a professional moving company. So grab a pen and get ready to check off those tasks individually!

Create a catalogue of all those who require notification

Consider all the individuals who depend on your present address. In addition to friends and family, you must inform your employer, children’s schools, GP, dentist, optician, bank, mutual society, insurance firms, and so forth. Consider all the individuals and establishments that contact or mail you, and ensure they are informed of your relocation.

Notify your landlord or property proprietor

If relevant, communicate with your landlord or property proprietor to inform them of your intended move. Even if you have already informed them of your intention to terminate your tenancy or rental agreement, it would be beneficial for all parties involved to provide an official letter or email specifying your departure date. It will offer you protection in case of any rental disputes and ensure a clear understanding between both parties.

Inform Important Parties

Notify your employer or educational institution about your change of address. Update your address with healthcare providers, including doctors, dentists, and opticians. Inform your local council to update your electoral registration details.

Utilities and Services

Schedule the disconnection of utilities such as gas, electricity, and water at your current property for the day after you move out. Connect utilities at your new home: Ensure the necessary utilities are set up and functioning before arrival. It includes electricity, gas, water, internet, and other essential services.

Change of Address

Inform the Royal Mail of your change of address to ensure your mail is redirected to your new home. Update official records: Notify government agencies, banks, insurance providers, and other institutions about your change of address. Inform service providers: Contact utility companies, internet and cable providers, and phone companies to arrange for services to be transferred or cancelled.

Organise for your post to be redirected to the Post Office

Although you may have already updated your address with your utility and service suppliers, there will still be numerous databases that list your previous address. The redirection service is a contingency plan to ensure you receive mail from individuals unaware of your address change. Make sure to arrange for all your mail to be redirected to your new address, which can be done at the Post Office. There is a fee associated with this service, but it is much more convenient than relying on the new occupants of your property to forward your mail.

TV License and Subscriptions

Inform the TV Licensing Authority about your move to ensure uninterrupted television services at your new address. Cancel or update subscriptions: Contact your magazine subscriptions, streaming services, and any other subscriptions you have to update your address or cancel services if needed.

Take apart non-essential furniture and cupboards

Make it a priority to dismantle the furniture and cabinets you intend to bring along, as long as they can be reassembled. It will significantly simplify the moving process and reduce the risk of damage if they are packed in a flat state.

Organise the last metre readings and bills

Obtaining the final metre readings for your electricity, gas, and water metres. It guarantees a smooth transition without any disagreements between you and the new owner of your house. Additionally, upon moving into your new property, promptly record the metre readings and compare them with the lessons provided by the previous occupants.

Verify that your home insurance provides coverage from the day of the move

Refer to your home insurance policy documents to ensure they include your property’s coverage during moving. Since significant lifting will be involved in both your old and new homes, there is a potential risk of property damage. It is important to understand your liability in such cases. Alternatively, contact your insurance company for personalised advice and information, particularly if you are contemplating switching providers. It may present an opportunity to negotiate for a more favourable deal.

Prepare your new residence for occupancy before settling in

During the day of your relocation, your goal will be to transfer your possessions and unload them efficiently and promptly into your new dwelling. Undertaking the task of cleaning your new home on the same day of the move, particularly before the commencement of loading items, will prove challenging due to time limitations. Therefore, it is advisable to contemplate utilising steam-cleaning methods for the carpets and walls before your scheduled move-in day.

Accommodation during the interim period

Suppose you anticipate a period where you’ll be in-between houses or unable to move into your new home due to renovation work. In that case, arranging temporary accommodation at the earliest opportunity is advisable. Booking hotels in advance tends to be more cost-effective, and you won’t encounter the same room demand as you would if you left it until the last minute. If you’re considering storing some of your belongings, contact a storage facility to inquire about availability.

Maximise the utility of your Wi-Fi

The Wi-Fi setup at your new home may take a few days, so make the most of the functioning wireless internet in your current residence while you still can. Please print out any necessary directions or instruction manuals for new electronic devices for your new property. In case of urgent internet requirements, you can consider seeking out a nearby café or relying on your mobile data.

Create an informative information pack for the new owner of your home

It would be highly beneficial for the new owner to have a comprehensive factsheet that outlines all the essential details about your house. It will help minimise the likelihood of them contacting you repeatedly with inquiries while you are in the process of setting up your new home. Include information such as the location of the stopcock, gas and electric metres, garbage collection schedule, and details regarding energy, broadband, and landline providers.

Organise childcare and pet care for the day of the move

The day of the move tends to be bustling and frantic, so the last thing you want is to have a young one (whether a child or a pet), adding further complexity to the day. Make an effort to arrange for family members or a registered childminder to care for your children while you relocate. As for pets, consider utilising a pet transportation service to ensure their safe arrival at your new home.

The moving day

When the moving day arrives, you may not have the opportunity to visit the shop if you require something essential. That’s why it’s advisable to assemble a box of items that will be useful to you in a nearly empty house. The kit should comprise a kettle, milk, tea, coffee, mugs, bread, bottled water, toilet roll, toiletries, cutlery, and plates.

Moving requires careful planning and organisation, but with the help of this comprehensive checklist, you’ll be well-prepared for the journey ahead. Remember to start early, stay organised, and enlist the assistance of professionals when needed. By following this checklist for house removal, you’ll be able to tackle each task systematically, ensuring a smooth and stress-free.

Related Articles

The Average Cost of Removals in the UK

The Average Cost of Removals in the UK

The Average Cost of Removals in the UK Moving can be a stressful and expensive process, especially when it comes to hiring a removals company. The cost of removals in the UK can vary depending on several factors, including the size of your property, the distance of...

How to Make Your Home Move Stress-Free ?

How to Make Your Home Move Stress-Free ?

Are you planning to move to a new home in London? Moving can be stressful and time-consuming, but with the help of professional house moving and packing services, the transition can be much smoother. Regarding house moving and packing services in London, there are...

How to label boxes for moving?

How to label boxes for moving?

Moving to a new house can be stressful, especially if it's your first time. The process involves a lot of organisation, and feeling a bit overwhelmed is normal. The pressure mainly comes from getting everything ready for the move and dealing with the emotions of such...